As I promised a couple of weeks ago, here is a fairly-easy DIY (and very inexpensive) that can save you at least one cabinet's worth of space. For tiny kitchens, like mine - our pan and utensil organizer is a lifesaver. It can also look good and blend into your existing kitchen aesthetic with a couple of coats of paint.
The pegboard - finished!
(I apologize for the weird look of the photos - our camera is on the fritz)
We simply didn't have enough cabinet space to hold all of our pots and pans, and our kitchen only had one very small drawer in it. We purchased a baker's cart, (our's is from Ikea), which definitely helped the situation, but we still needed more storage options if we wanted easy access and organization of our most commonly used kitchen wares. I thought pegboard would be the perfect solution (Julia Child made the idea famous), and figured above the baker's rack would be the perfect spot.
First, I wanted to see how other people had implemented a pegboard into their kitchen so I could get some tips and words of wisdom.
The below proved to be valuable resources:
• Apartment Therapy "How To: Make a Pegboard Wall Organizer"
• DIY Network "How to Install a Pegboard" (gives thorough directions on how to measure, frame, and install the board).
The Price break-down:
• Pegboard: $17.48 (We also had it cut to size - most home improvement stores provide this service
• Framing wood: Scraps leftover from a previous project
• 32 piece assorted pegboard hooks: $3.87
• Tool rack: $2.97 (See where I used it for holding measuring cups)
• Anchors: $1.98
• Screws: $1.18
• Paint: (Leftover high gloss and flat paint (I mixed them to create a finish more durable than flat, but less shiny than gloss) from when I painted the kitchen.
Also note, we did this without a drill, but it is definitely easier to use a drill than drive the screws by hand.
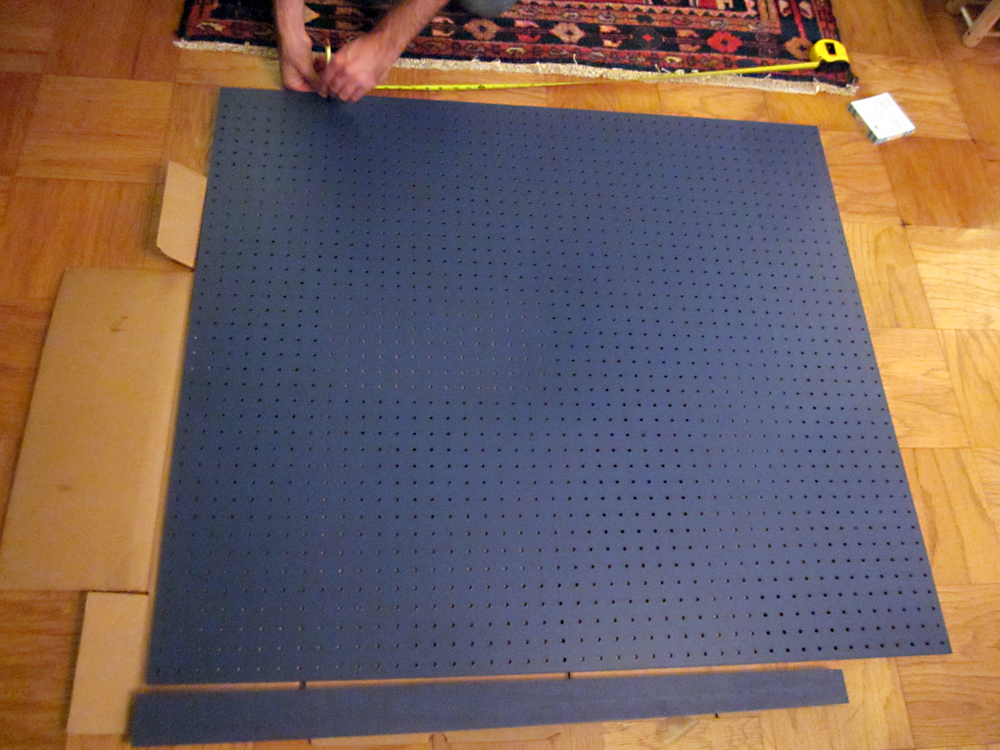
We started out with 2 pieces of wood to "frame" the pegboard, and a piece of white pegboard cut to the desired size. The purpose of putting the "frame" behind the pegboard is to create enough space between the wall and the pegboard to insert the various hooks. I painted the wood and the pegboard with leftover paint from when I painted the kitchen. I wanted the pegboard to blend in with the wall.
From this side angle you can see how the frame creates enough space between the wall and the pegboard.
Chris has much more patience with measuring and prep work, and is better with math, so he did the measuring to attach the frame to the pegboard. We chose to attach the frame to the pegboard, than mount it to the wall, but it might be easier to mount the frame to the wall, and then mount the pegboard to the frame.
Chris also carefully measured where to put in anchor screws so the screws in the frame would line up.
Then tighten the screws into the anchors!
Now comes the fun part - getting to arrange pots, pans, and other utensils on the pegboard!
A variety of hooks
My package of hook assortments also came with hook locks - the black piece you see over the hook, which I didn't know about, but they are great at keeping the hook from falling out when you take a pan down.
I was lucky that the bottom of our baker's cart's shelves were slatted, and our pot and pan lids fit perfectly in them!
The magnetic knife strip I actually found on the curb in someone's giveaway pile. I simply purchased screws long enough to go through the knife strip, pegboard, height of the frame, and then into the wall - and now have easy access to my knives.
What do you think? Would you ever consider a pegboard organizer in your kitchen? Do you currently have one?
Showing posts with label kitchen. Show all posts
Tuesday, November 8, 2011
Wednesday, October 26, 2011
An easy furniture repurposing idea and an AMAZING GIVEAWAY!
So remember last week when I revealed my kitchen after stenciling it with a Royal Design Studios stencil? Well, I have an addition to that kitchen to reveal - and am announcing a giveaway hosted by Royal Design Studios! To enter the stencil giveaway, go to the Royal Design Studios site, peruse the amazing stencil selection, and come back here and leave a comment, or email me, with the stencil that you would like to win. To comment on this post (scroll to the bottom of this post and right above "Labels" you will see a number followed by the word "comments." Click on the word "Comments." Or, you will see a link, "Post a Comment," which you click on to comment.
If you receive posts in your email feel free to respond to the email noting that you'd like to be entered in the drawing. Then, go to Royal Design Studio's facebook page and "Like" them. For this giveaway, the stencil you select must be under $50.
Here is my kitchen and the easy furniture repurposing idea:
For this project I repurposed a medicine cabinet into a spice rack.
Here is the mirror situation that was in our bathroom when we moved in. It has since been amended. The medicine cabinet, on the right, was not my style at all, with the carved flowers and dry brush metallic silver paint treatment.
I unmounted the cabinet, and removed the door/mirror. I also gave the cabinet a wash with a cloth and mild soap. I decided to leave the holes where the door was attached and the magnetic closure. I liked that it added some history/story to the piece.
I painted the cabinet in an eggshell white with a roller. A roller creates a smoother finish than a brush. I used a brush to get into the corners. Note to the wiser than me: If you're not sure the finish of the furniture you're about to repaint/refinish - sand it (and wear a mask in case the previous finish is nasty), and PRIME. Turned out the paint didn't stick to well to whatever finish the cabinet had on it originally, so I had to go back and prime it.
voila! The finished medicine cabinet turned spice rack in our new kitchen!
It looks like a custom piece, and the white contrasts nicely off the navy blue, I think.
I'm working on another kitchen DIY which I'll reveal next week. I'm very excited about this one - as it's going to free up a cabinet's worth of space.
I'll end by leaving you with some stenciling inspiration from RDS. Remember to comment with the stencil you'd like to win and "like" them on facebook! (They also have a Twitter feed). The drawing closes Nov. 2nd at 6 PM EST. I'll announce the winner the following day. Good luck!
Tuesday, January 18, 2011
Bright and cheery kitchens
Wednesday, January 12, 2011
Tuesday, November 9, 2010
Lovely kitchens that will inspire you
Once the weather gets chilly we spend even more time in the kitchen baking up warm goodies. So I thought it'd be appropriate to post some kitchens which get me excited for the upcoming cooking/baking season - even though I primarily just eat the food - and someone else makes it. All of these images are from our dearly departed Domino.

What do you think of the back splash and counter?
Interesting wood paneling...yay or nay?
so bright and cheery - perfect for muffin eating in the morning


What do you think of the back splash and counter?
Interesting wood paneling...yay or nay?
so bright and cheery - perfect for muffin eating in the morning


Tuesday, November 2, 2010
Bright, airy, laid back interiors
Subscribe to:
Posts (Atom)